Can I tell you something a little embarrassing?
I spent years — years — shooting beautiful landscape photos on my camera. Carefully composed, perfectly exposed, stunning 16:9 images that I was genuinely proud of. And when I posted them online? Nothing. Not a singe response. Meanwhile, some guy holding his phone sideways right next to me was getting 50,000 views on a Reel that wasn’t as good as mine. It was different though. Instead of shooting for print or a wide screen monitor, he shot shot his photo vertical. You know, the way people look at their phones?
That was my wake-up call. And if you’re still in the horizontal-only mindset, this is yours.
Here’s the truth about travel content in 2026: Instagram Reels, TikTok, and YouTube Shorts are where people discover travel destinations. They are where we all endlesssly scrolling looking for something that catches our eye. And all of them are built for the 9:16 vertical format. If you’re not shooting vertical content, you’re not reaching the people who would love your work the most.
Good news: it’s not that hard. Turn the camera vertical. That’s it. We are done now. Thanks for reading.
What? Still here? Ok let me expound a little.
First, Let’s Talk About Why This Actually Matters
TikTok has over 1 billion monthly users. Instagram Reels get 22% more engagement than regular video posts. YouTube Shorts are now driving more channel discovery than long-form videos for a lot of creators. And every single one of those platforms was designed for the way people hold their phones — which is vertical, almost always.
When you post a horizontal photo or video on these platforms, best case it gets letterboxed. Worst case it looks tiny and weird and people scroll right past it. The algorithm doesn’t love it either. The platforms actively promote content that was shot natively in the format they’re designed for.
This doesn’t mean horizontal photography is dead. For print, for certain websites, for proper landscape images where you need that wide field of view — horizontal is still king. But if growing an audience and actually being seen online is part of your travel photography goals, vertical content is no longer optional.
The Gear You Actually Need (It’s Less Than You Think)
Here’s the part where I could rattle off a list of expensive equipment. I’m not going to do that. The truth is, the phone in your pocket is genuinely good enough to produce viral travel content. What you need is a few smart accessories, not a whole new kit.
A Phone Gimbal – Video Must Have
OK Maybe it’s not a must have, but this is the single biggest upgrade you can make to your mobile travel content. A gimbal stabilizes your phone while you walk, pan, and move — which means your shots look smooth and intentional instead of shaky. The DJI OM series and the Insta360 Flow 2 are both excellent and fold down small enough to toss in a daypack. You could also invest in something like a DJI Osmo Pocket 3 which is a neat little camera/gimble combo that shoots 4k video and fits in your pocket. More money but potentially worth it.
A Wide-Angle Clip-On Lens
Your phone’s native camera does a decent job, but a clip-on wide-angle lens (brands like Moment and Sirui make great ones) gives you a dramatically wider field of view. This is especially useful for vertical content because you’re working with a narrow frame — a wider lens gives you more environmental context in the shot.
A Small Flexible Tripod
Something like the GorillaPod or a small tripod from Manfroto lets you prop your phone on basically any surface — a rock, a railing, a restaurant table — and shoot yourself with the environment behind you. Essential if you’re a solo traveler who wants to be in your own content.
Wireless Earbuds (as a Remote)
Most wireless earbuds have a pause/play button that doubles as a shutter trigger when your phone is in camera mode. Cheap, already in your bag, game-changer for solo shooting.
That’s genuinely it. You don’t need more than this to start. If you have a more expensive setup – well you probably alreay know how to shoot vertical, you just aren’t doing it.
How to Actually Compose a Great Vertical Shot
This is where most people struggle, because our instincts for good photography composition are trained on horizontal frames. Vertical has different rules.
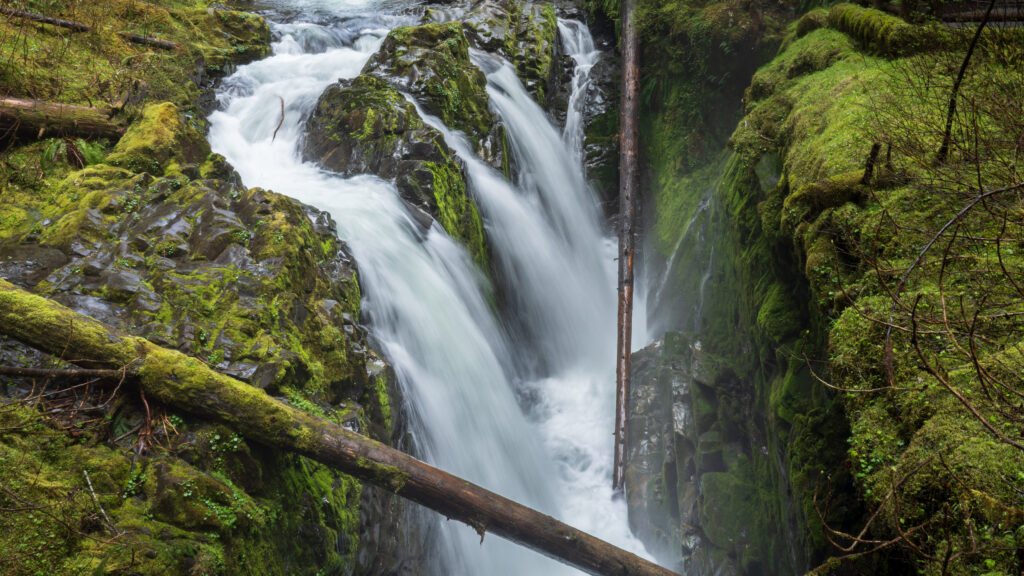
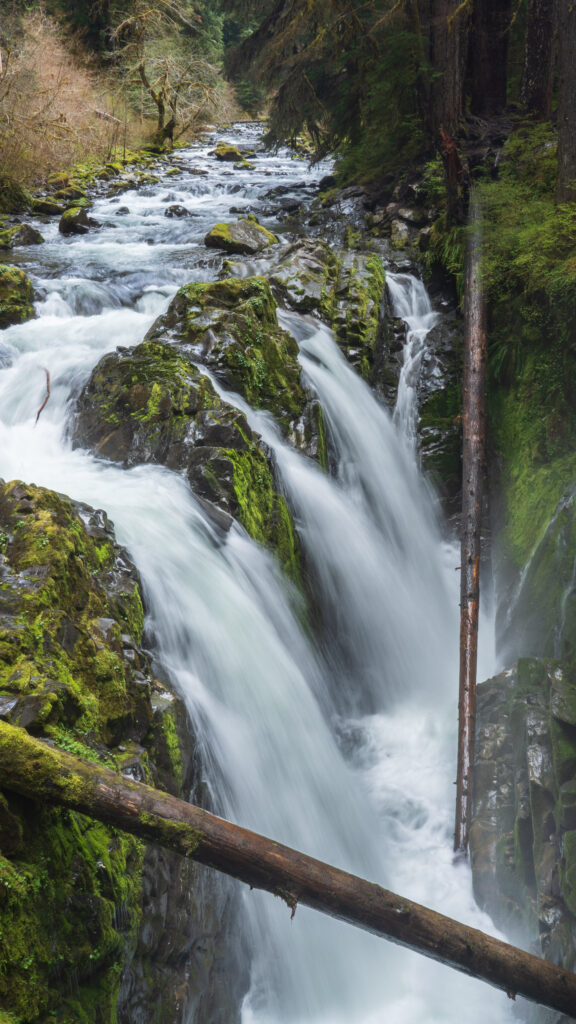
Fill the frame vertically. Use the full height of the frame intentionally. If you’re shooting a waterfall, let it go from top to bottom. If you’re shooting a street, let it recede into the distance. The vertical format rewards tall subjects.
Put yourself in it. Solo travel content that performs well almost always has a human in it — even a small one in a big landscape. That tiny figure at the bottom of a cliff face? It gives the viewer a sense of scale and makes the image feel like a story rather than a postcard.
Use foreground elements. Because the vertical frame is narrow, it can feel flat without depth. Find something to put in the foreground — flowers, a railing, a doorway — to create layers that draw the eye through the image.
The rule of thirds still applies. If anything, it’s more important in vertical composition. Put your horizon at one-third or two-thirds up the frame, not dead center.
Leave safe zones for text and UI. On most short-form video platforms, the bottom 20% of the screen has overlaid text (captions, username, buttons). Don’t put anything important down there or it’ll get covered up. Same for the top corners where platform UI often appears.
Shooting Video vs. Still Photos
A quick note here because they require different approaches.
For still photography, just switch your phone camera to 3:4 or 9:16 crop mode and shoot. Simple.
Or if you aren’t using your phone, turn your camera verticle and take a picture.
Or crop your image so you have both options, especially if you have a mirrorless or DSLR camera. Hey I never said this was complicated 🙂
For video, you have a few options:
- Shoot natively vertical (phone held portrait). Best quality, most natural for the format.
- Shoot horizontal and crop in post. This works okay but you lose a lot of resolution and the framing often doesn’t translate well.
- Shoot on action cameras (GoPro, Insta360) in their vertical modes. The Insta360 cameras in particular are brilliant for this because they shoot a round format that you crop in post, which means you can choose your framing later.
My recommendation: shoot both. Shoot vertical natively for most online travel content. Shoot landscape if you want prints, full monitor images, or just like the look. Digital is cheap, there is nothing stopping you from shooting it both ways.
Editing for Vertical: Apps That Make It Easy
You don’t need a desktop computer for this. These are the apps I use most:
CapCut — Free, powerful, designed specifically for short-form vertical video. Great templates if you want a quick workflow, but also enough manual control to do something more polished. This is probably where you should start.
LightRoom Mobile — For still photos, nothing beats Lightroom for color grading. The free version is surprisingly capable. Create a preset that matches your visual style and apply it to everything — consistency is half the battle when it comes to a cohesive travel feed.
Davinci Resolve — Another solid free option for video, very powerful. Basically you can create Hollywood level movies with this – or quickly edit your Iphone movies.
Insta360 Studio — If you’re shooting on an Insta360 camera, their companion app is genuinely excellent and does a lot of the heavy lifting for you with AI-assisted editing and reframing.
The Strategy Side: Getting Your Content Actually Seen
Okay, this is the part most photography guides skip. Shooting great vertical content is only half the equation. Getting it in front of people requires a little bit of intentionality.
Post consistently, not perfectly. The algorithm rewards regular posting more than occasional masterpieces. Three solid posts a week beats one perfect post a month, every time.
Use location tags and destination hashtags. When people search for travel content about a specific place, location tags are how they find you. Always tag your location. Always use a few relevant destination hashtags (#route66 #arizonatravel #roadtrip etc.) — not 30 of them, just 5-8 specific, relevant ones.
Write real captions. The platforms have gotten much better at reading and rewarding content that sparks genuine engagement. A caption that asks a real question, tells a real story, or shares something authentic will consistently outperform a string of emoji.
Make the first 3 seconds count. This is the golden rule of short-form video. On TikTok, Reels, and Shorts, users decide whether to keep watching in the first three seconds. Start with your most visually striking moment, or lead with a hook that creates curiosity (“I drove 2,400 miles alone and here’s what happened…”).
A Word on Authenticity
Here’s the thing I keep coming back to: the travel photography world in 2026 has gotten really good at perfection, and people are kind of tired of it. The feeds full of flawlessly edited golden-hour shots of impossibly gorgeous destinations — they’re beautiful, but they don’t feel real anymore.
What people respond to now — what I respond to — is honesty. The shot where it’s raining and you’re a little bit lost and the sign is hard to read and it’s still somehow perfect. The meal that looked nothing like the photo but tasted incredible. The moment where you’re clearly just a person with a phone, experiencing something wonderful.
Don’t over-produce your travel content. Shoot the beautiful shots, yes. But don’t throw away the real ones.